You noticed it sometime back, but ignored it hoping it would go away. But, it hasn't. In your embarrassment, you quickly wipe off your fork tubes when meeting friends for fear that they might say something. Worse yet, it's gotten so bad that your front brake pads have become contaminated with fork oil and you've got oil spatters all over the front of your riding pants.
Well, my friends, it's time to do something about it. Today, we're going to tear into those troublesome forks and replace those pesky seals. And then you can ride in confidence knowing that you've got a clean looking machine.
(Note: These instructions were developed while working on a 1981 XJ650H and should be adequate for all 650 models up to 1983. Other models will very in design.)
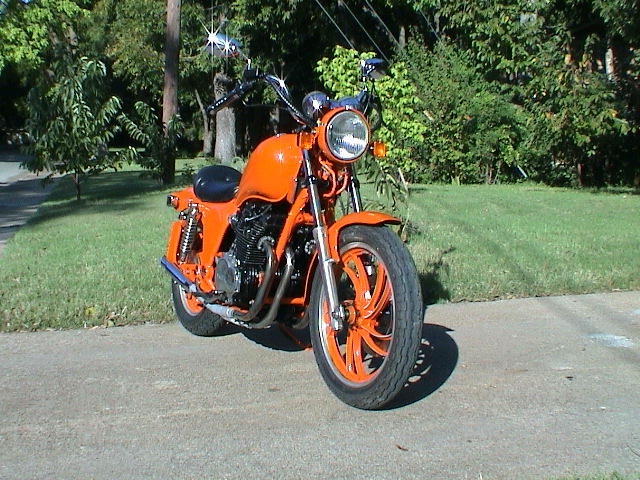
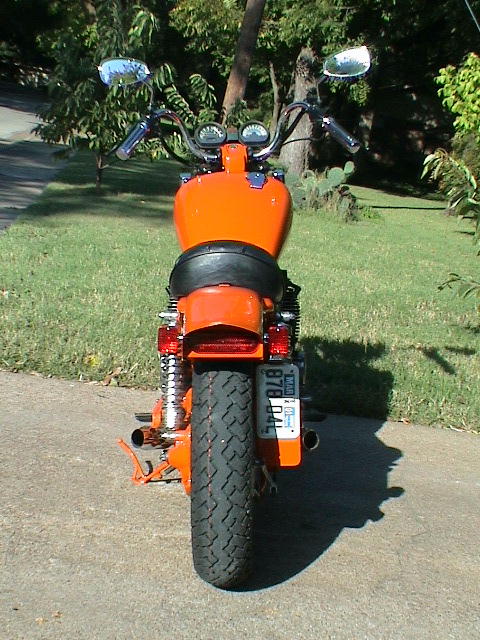
Today we'll be working on my trusty steed:

Before we get started, let's quickly review all the parts to a front shock:

As I step through the directions, I'll refer back to this image by placing in brackets each part's corresponding number. For example, if I say to remove the cap bolt, I'll follow it with [15] so that you can look at this picture for clarification.
Here are the steps...
1. Place the bike on a level surface and on its center stand.
2. Using a jack, raise and support the bike so the front tire is off the ground.
Note: you will want to make sure the bike doesn't rock back and forth on the center stand with the front wheel off the ground.
3. Remove the front axle cotter pin and discard. Loosen and remove the axle nut and washer.

4. Slide out the axle, tapping gently with a hammer if necessary.
5. Remove the speedometer gear and remove the tire.
6. Remove the bolts holding the front fender and the brake caliper(s). See arrows for locations.

Moving to the top end of the forks, we'll next need to remove the handlebar to gain access to the cap bolts[15], circlips[17], etc. Note: if you have a fairing, you may need to remove it to complete the following steps. Also, on some models, removal of the handlebar isn't required as it doesn't cover the end of the fork tubes. If this is your case, skip to Step 9. Another option is to break the shocks down after removing them from the bike. If you choose this option, skip to Step 13. You may need to refer to Steps 9, 10, 11, and 12 for information on removing the fork springs[11].
7. Remove the plastic center cover and the handlebar clamp bolt dust covers. Loosen and remove the handlebar clamp bolts and clamps.

8. Remove and set aside the handlebar.

9. Remove the fork caps[16] covering the cap bolts[15] and circlips[17].

Note: On some models, the cap bolts[15] will have an air valve for filling the shocks with air. If you have this style, you will want to let the air out by depressing the valve before removing the cap bolt[15].
10. Using a clamp, compress the fork spring[11] by pushing down on the cap bolt[15]. This will allow you to pry out the circlip[17].

11. Remove the cap bolt[15]. Replace the o-ring[12] if it has become damaged. Remove any rust that may be present on the cap bolt[15].

12. Slide out and set aside the fork spring[11].
13. Remove the drain plug[18]. Drain the fork oil into a suitable container. Raise and lower the shock several times to remove any remaining oil. Replace drain plug[18] when finished.

14. Next, we'll need to loosen, but not remove the upper and lower shock pinch bolts.


15. Using a wedge or large-bladed screwdriver, pry apart the lower pinch clamp to allow the shock to slide down and out.

16. Insert your cylinder holding tool (or something similar) into the fork tube. This tool can be purchased or one can be built from scratch using a spark plug socket turned upside-down.

17. Flip the assembly over and remove the cylinder securing bolt[20] from the bottom of the fork assembly.

Here you can see the three separate parts of the shock assembly:

18. Remove and discard the old dust seal[6], oil seal clip[4], and oil seal[5], being careful not to damage the outer fork tube[2] in the process.
Here are the new parts we'll be installing:

19. Clean the outer fork tube[2], then install your new oil seal[5], oil seal clip[4], and dust seal[6].

20. Clean the inner tube[7]. Lubricate the newly installed seals with a light oil and slide the inner tube[7] into the outer fork tube[2].

From here, you'll just need to reverse the process to finish reassembling the fork assembly.
If you discover the taper spindle[9] has fallen out while working with the shock, don't panic. Hold the tube at a slight angle and slide it back down the tube. As illustrated, the tapered end faces up and fits into a boss at the end of the outer fork tube[2]. After you get it facing right-side up, push it into the boss with a long dowel. Also, when you're replacing the fork springs[11], you'll notice there's a difference in spring pitch, i.e. one end is wound tighter than the other. This tighter wound end faces up or goes in last. (Unfortunately, I forgot to take a picture of it.)
As you're reassembling the shock, you'll need to put oil in it. This should be done before you slide the fork spring[11] back in after it has been remounted on the bike. On my '81 Maxim, the factory service manual calls out for 262cc (9.24 oz) of Yamaha Fork Oil 10wt or equivalent. On later models, I presume with air-assist, the factory service manual says to use 278cc (9.4 oz) of oil. I used Castrol 10wt Non-Detergent in mine. Also, if you do have air-assist, the factory service manual says to fill with, but not to exceed, 1.2 kg/cm² (17 psi) of air using a manual air pump. Of course, you'll want to adjust this air pressure to suit your riding style.
Hopefully, I didn't miss anything in the directions as there were quite a number of steps. If you see a mistake or something I've left out, let me know about it so I can correct it.
That's about it. Good luck!
(Written by Don Bangert Author of several How-To's and the blog,
The Path Less Traveled.)
 Most of my posts are about me and what I have been doing. While they are typically motorcycle and XJ650 related sometimes they are more of a rant to keep me out of the clock tower with the bottle of Southern Comfort and the high powered Italian assault rifle.
 This has got to be one of my favorite motorcycles. Mainly because it's mine. But also because I know that no detail was overlooked in the building of this custom Yamaha XJ650 Maxim Cafe Racer. This bike was built for a 'round the world trip starting in Europe. The entire bike was stripped down to the frame and built up from scratch.
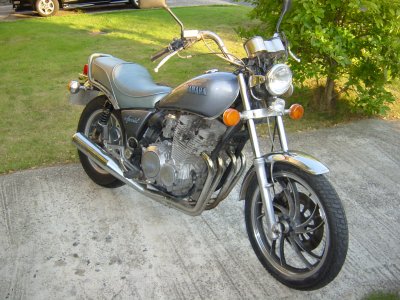 This is a 1983 XJ650 Maxim Special. This bike is pretty close to stock with the exception of the silver upholstery on the seat. This motorcycle was exported from the United States to England back in 1989.